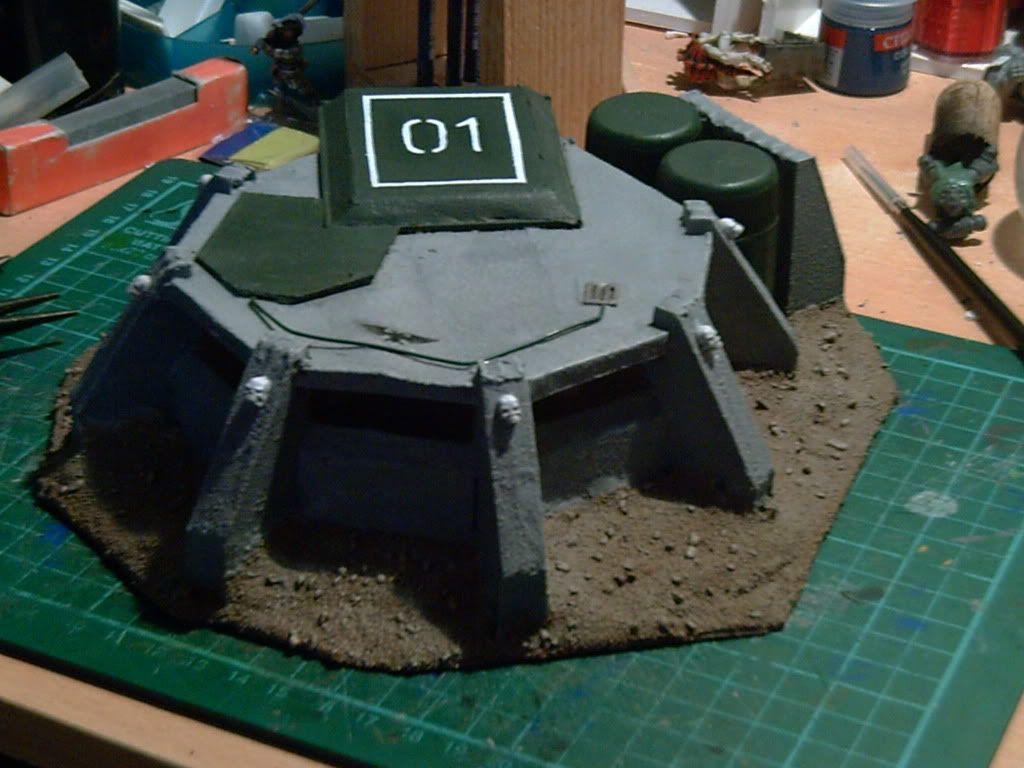
Hi all. It's been a while since I was last on here thanks to real life. I have not been idle though. Today I bring you a wonderful tutorial! I showed you a picture of my imperial guard bunker a while ago. Well, since I'm having to build another anyway, I thought I'd make all you internet people some templates and a little instruction book for building the basic frame. I will be posting WIP shots of my wrecked one as it's constructed, but I'll save that for another day. On to the (shortened) tutorial! The full version is available with the templates as a pdf at the end. Please forgive the template quality. I prefer to use my drawing board for hobby work so they are all done by hand.
Dawn of War Inspired Imperial Guard Bunker
1: Glue the templates onto the required materials and cut out solid line only.
2: Place or glue the BASE TEMPLATE onto your desired base.
3: Glue all 1 parts into the marked notches on the BASE TEMPLATE.
3a: Glue parts 2a and 2 together (see Figure 3a).
4: Glue the completed part 2 to the base.5: Trim the tops of parts 3 at an angle to dotted line (see Figure 5).
6: Trim the sides of parts 3 to fit in the gaps between parts 1. Glue in place.
7: Trim the sides of parts 4 and 5 to fit between parts 1 and 2 as shown on the BASE TEMPLATE.
Glue in place.
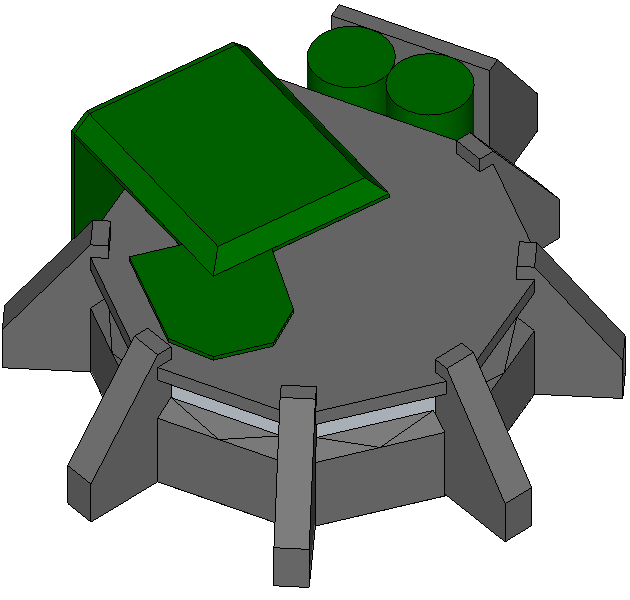
8: Part 6 should then be place on top, level with part 2, and with approximately 5mm of parts 1 showing
(see Figure 8).
9: Glue part 7 over part 2.
10: Glue part 8 on part 7.
11: Glue part 9 onto the back of parts 2, 7 and 8 (see Figure 11).
12: The main structure is now finished. The cylinders are made from 2L drinks bottle caps and the concrete
support behind is two parts 1 with card between giving a length of 50mm (see Figure 12).
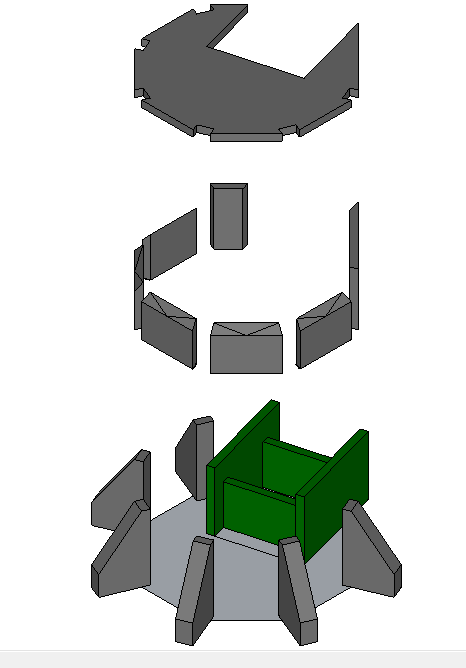 |
| Steps 5-8 |
 |
| Steps 1-4 |
 |
| Steps 9-10 |
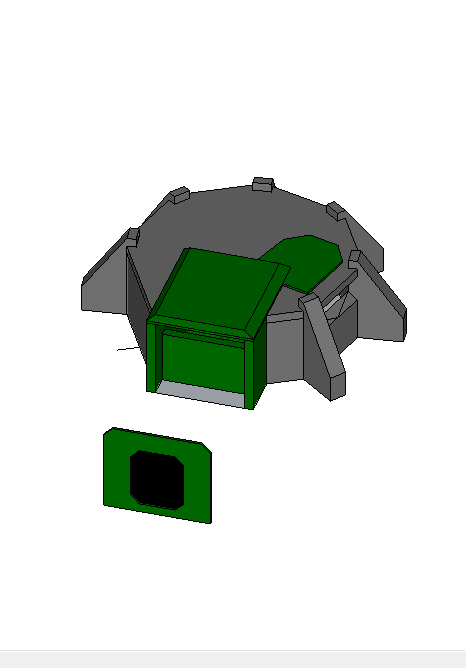 |
| Step 11 |
So fairly simple for the competent modeller. Give us some feedback please.
Here's the LINK for the templates and full instructions. Just print to A4 with no scaling.
Addendum: PLEASE NOTE THAT ALL SECTIONS ARE 5mm FOAMCORE APART FROM PART 1 WHICH IS 10mm. Because you always miss the obvious stuff.
Excellend!
ReplyDeleteWOW!!! Thanks so much for sharing this - I've been wanting to make something like this for a long time!! Any more coming up by any chance?
ReplyDeleteI did a similarly shaped bunker myself a few years ago but I think I actually prefer this design to my own. The pic above will get stored away for future reference...
ReplyDeleteLook forward to seeing more.
@Kiski - thanks
ReplyDelete@DimmyK - I've got free time on my hands just now. Usually takes me a couple of days to whip something up. What did you have in mind?
@Rictus - Cheers. Hope you found the link to the templates, not just the pretty pictures above.
Bunker looks wonderful. If possible, some more dimensions would be great.
ReplyDelete